
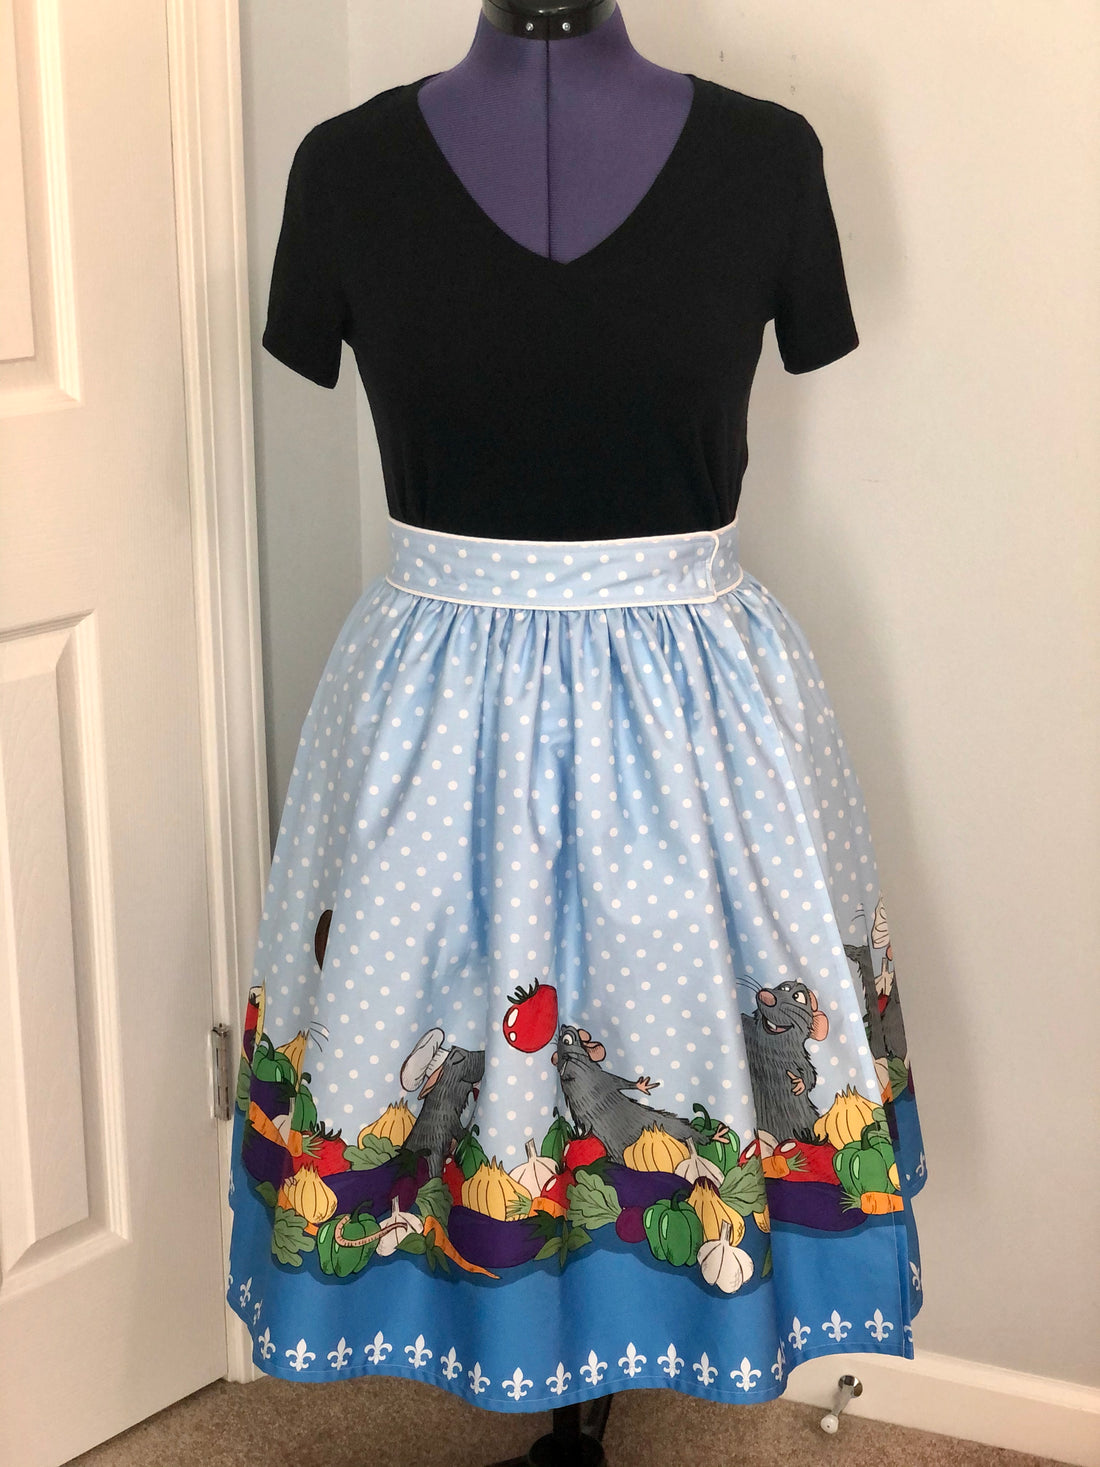
Wrap Skirt with Piped Waistband Tutorial
Wrap Skirt with Piped Waistband Tutorial

Materials:
- skirt fabric in a woven fabric base (border prints, like our "Bon Appetit" Border, are great with this pattern) - see below to see how much you will need
- waistband fabric, also in a woven fabric base (you can use a separate fabric, but for this tutorial, we made the waistband from the same piece of Border Print fabric.
- 1 pack of coordinating piping (you will need: waistband measurement x2 + 5")
- SF101 Fusible Interfacing (1/2 yard of 20" wide)
- sew on skirt hook & eye closures (1 or 2 sets)
- sew on snaps (2 sets of the large size)
- Optional: soft waistband elastic (if you would like your waistband to be very sturdy, you can insert elastic before topstitching the waistband closed - I did not use it for this tutorial)

How to measure:
This is a wrap skirt style, so you'll need more skirt than just your waist to create the overlap. The skirt consists of 2 pieces- a waistband and the skirt.
Waistband: take your waist measurement and times it by 1.3 (the .3 will become the overlap).
Skirt: take the waistband measurement from above and times it by 2.5-3, depending on how full you'd like your skirt (the skirt pictured is 2.5). This will be quite a length of fabric because we are going to gather it.
* This "Bon Appetit" border print runs along both sides of the fabric, so I stitched two pieces together for my skirt piece. Since the skirt is gathered, it hides the seam.

Examples (done at 2.5 skirt fullness):
30" waist = 39" waistband, 98" skirt
35" waist = 45.5" waistband, 114" skirt
40" waist = 52" waistband, 130" skirt
** "Bon Appetit" Border Print has the design running along both sides of the fabric. If your skirt will be less than ~26" long, you will be able to use both sides.

A rough idea of how your fabric will be used for the skirt and waistband:

STEP 1: First, determine the length of the skirt you'd like. In this tutorial, I went with a 25-26" length (not including the 2" waistband). Cut your Skirt A and Skirt B pieces out (each piece: height will be your desired length of skirt, width will be HALF your skirt measurement from above).
STEP 2: Join pieces Skirt A & B together- place them right sides together and join along one of the short edges. This will be the only exposed seam on your skirt, so feel free to zig zag, serge, or even use a French seam.
STEP 3: Hem your skirt piece- you should have one looonggg piece. Hem both short sides as well as the bottom edge. To hem, I fold up the edge 1/4" and iron, then fold up another 1/4" to hide the raw edge. Top stitch to hem (I like to use a 3-3.5 stitch length).
STEP 4: Waistband piece- you should have a strip of fabric from the middle of your border print left. Cut a piece as wide as your waistband measurement and 5" tall.
STEP 5: Cut your SF101 fusible interfacing in 5" wide strips. Fuse to the wrong side of your waistband piece. You may have some extra- just trim it off.
STEP 6: Cut your waistband piece in half the long way so you have two 2.5" X waistband measurement pieces.

STEP 7: Pin and baste your piping! Take one waistband strip (this will be the exterior one that shows) and pin your piping along both long edges and the shorter right edge. Clip the edge of the piping to ease around the corners taking care not to cut into the piping. Baste using a long stitch 1/8" from the edge.


STEP 8: Now that your piping is attached, lay your other waistband piece on top with right sides together. Sew along the long ONLY the top edge as close to the piping as you can. Flip up and press so that the bulk of the seam of the piping faces down.

STEP 9: Mark the top edge of your skirt piece into 4 equal sections (your seam between skirt pieces A & B is already the center).
Gather your skirt piece. There are a lot of different ways to do this- if you have a ruffle or gathering foot, you could use it. Personally I am old-school and I run the longest stitch length I can (don't backstitch!) and then pull one to gather. Since it's such a long skirt piece, I divide my gathering stitches into 4 sections. Its okay if you gather it a bit too much, we can always ease out some of the gathers when we pin it to the waistband piece.
STEP 10: Mark the bottom edge of your waistband piece into 4 equal sections (the piping should run through the long middle seam, down the lower portion of the right side, and all the way along the bottom edge).
Pin the top of your gathered skirt to the bottom edge of your waistband. I put my waistband piece right side up and then lay the gathered skirt face down on top, matching up the markings you made earlier. You will likely need to adjust your gathers to space them out evenly in each quarter section. Use lots of pins to keep this in place!

NOTE: when pinning your skirt, pin your hemmed edge only to the piping. We'll be sewing your short waistband edges closed and you don't want your skirt piece caught up in it. On the waistband side with no piping, leave ~1/4" seam allowance.
STEP 11: Sew the gathered skirt to the waistband. This is the trickiest part- you want to get as close to the piping as you can without sewing over it, but you can't see it because it's between your skirt and waistband layers. I recommend sewing with the gathers on top (makes it easy to adjust and feed them through evenly) and using your fingers to push down to feel for where the piping is. Take your time, there's no rush. :)

STEP 12: When you're done attaching the skirt, flip up the waistband and it should look like this. Iron the waistband so the piping seam bulk is behind the waistband piece that is right above your skirt piece.

STEP 13: Flip the top waistband piece down and sew along the short edges, getting as close as you can to the piping on the right side. You want to match up the seam to the edge of your skirt piece. Clip the top corners and turn the waistband right sides out, using a pointy object (chopstick, pencil, etc) to poke the corners out.


STEP 14: Flip your skirt over so the right side is facing down. Flip under the raw bottom edge of the back piece of your waistband so it is 1/4" under and iron. Don't flip too much underneath as we will be top stitching from the other side and want to still catch this edge to close the seam. Remember that waistband elastic I said was optional? You can slip it into the waistband now before stitching it closed.

STEP 15: Top stitch from the front to close the back waistband seam. Topstitch along the upper piping edge as well. I like to top stitch on the polka dot fabric ~1/8" away from the piping.


STEP 16: Sew on your snaps and hook/eye.
Confession time... I did not have access to snaps and hooks/eyes when making this particular skirt, so here are the directions from my previous wrap skirt tutorial:
The snaps go on the end of the outside layer of your skirt (the end with the piping along the short edge) and the hook/eye goes on the under layer. Try on the skirt, mark where your overlaps are, and then hand stitch the snaps and hook/eye on.
You can also add a decorative button (veggie themed maybe) to the edge of your piped waistband.
____________________________________
I used sew-on snaps and hook & eyes. Pardon my less than stellar looking stitching. ;)

For the hook & eye, put the hook on the outer part of the skirt so that it hooks in and around the eye on the bottom later. In this photo, the skirt is laying with the front facing up.

Thank you all for reading- if you have any questions, please feel free to ask in our main Facebook group. If you decide to give this skirt a try, please post your photos! We'd love to see them!
Thank you,
Kimber
1 comment
Wow !!!!!!!!!!!